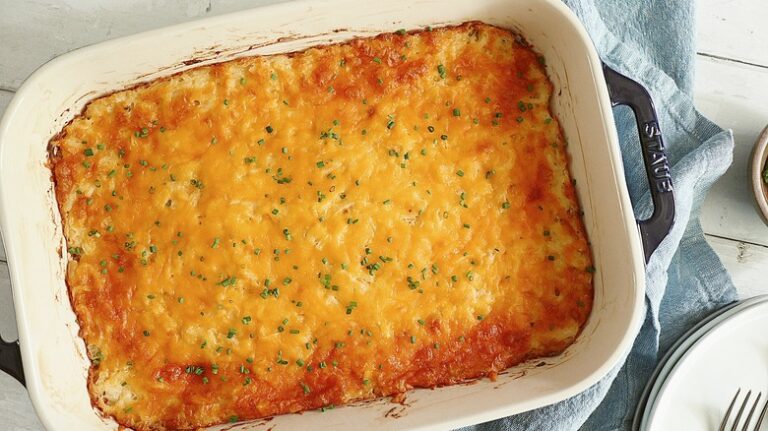
When it comes to a dish that is fitting for either breakfast or dinner, very few can compete with the indulgently comforting Cheesy Hash Brown Casserole Recipe. This combination of creamy, cheesy hash browns baked to perfection makes it a stunner for any occasion, especially a brunch potluck or a cozy family dinner. It’s comforting, hearty and oh-so-cheesy, there’s just no denying that this dish will tantalize your taste buds.
It’s a no-stress recipe that you can whip up with simple pantry staples. And if the word ‘casserole’ fazes you, let me tell ya, folks, there’s nothing to worry ’bout. This ain’t one of those tricky dishes that might give you a run for your money. It’s easy, cheesy and outrageously delicious. So, roll up your sleeves and get ready to delve into the world of Hash Browns and Cheese! Heaven, ain’t it?
- Prep Time: 15 minutes
- Cook Time: 45 minutes
- Total Time: 1 Hour
- Servings: 8 servings
- Yield: 8 cups
That’s the low-down, folks! Now, let’s get down to brass tacks and dive right into the recipe, shall we?
Ingredients & Equipment You’ll Need
- 1 bag of frozen hash browns (32 oz.)
- 2 cups of shredded cheddar cheese
- 1 can of cream of chicken soup (10.5 oz.)
- 2 cups of sour cream
- 1/2 cup of melted butter
- 1 tsp salt
- 1/2 tsp black pepper
- 2 cups of crumbled cornflakes
- 1/2 cup of additional melted butter
You’ll also need a large mixing bowl, a 9×13 baking dish, and a spatula.
The hash browns are the star of the show, providing a hearty base. The cream of chicken soup lends a touch of savory goodness, while the sour cream imparts lovely tanginess, and cheddar cheese ensures a delightfully cheesy explosion. The cornflakes get beautifully crispy in the oven, adding that much-needed crunch to the dish.
Make sure not to substitute the cornflakes with crispy rice cereal or bread crumbs, as it might make your casserole soggy. Stick with the original, folks!
How To Make Cheesy Hash Brown Casserole Recipe
- Preheat your oven to 350��F (175��C) and lightly grease your baking dish.
- In your large mixing bowl, combine the frozen hash browns, shredded cheddar cheese, cream of chicken soup, sour cream, 1/2 cup of melted butter, salt, and black pepper. Stir well till you see everything coming together beautifully.
- Transfer this hash brown mixture to your prepared baking dish and spread it evenly with your spatula.
- Toss together the crumbled cornflakes and remaining 1/2 cup of melted butter. Sprinkle this over the top of your hash brown mixture.
- Put the dish in the oven and bake for 45 minutes, or until the top is beautifully golden and bubbly. Let your casserole sit for a while before serving.
Tips For The Best Results
- Make sure the hash browns are thoroughly thawed to ensure even cooking.
- Use freshly shredded cheddar cheese for the best melt.
Storage Tips
- Leftovers can be refrigerated in an airtight container for up to 3 days.
Frequently Asked Questions
Q: Can I make this dish ahead of time?
A: Absolutely! You can assemble everything, excluding the cornflakes topping, cover, and refrigerate it overnight. Add the topping before baking.
Q: Can I use different cheese for this recipe?
A: Indeed, you can. Feel free to experiment with your favorite cheese in this recipe.
Q: Can I add any veggies to this recipe?
A: Sure thing! Bell peppers, onions or even broccoli would make a great addition.
Q: Can I freeze this casserole?
A: Definitely. Cover it tightly and you can freeze it for up to 3 months.
Q: What can I serve this with?
A: This casserole goes well with any meat or poultry dishes. It’s also great with a side salad.
Nutritional Facts of Cheesy Hash Brown Casserole Recipe
Your regular portion of Cheesy Hash Brown Casserole includes 300 calories, 22.7g of fats, 11.3g of proteins and 15g of carbohydrates. Mind you, it’s quite a carb load but every bit so delicious!
And there you have it, friends! Cheesy Hash Brown Casserole that is bound to impress any palate. Trust me, this is one recipe you’ll be making again and again. Don’t forget to save some for leftovers – cuz these are delicious even when reheated. Happy Cooking!


0 Comments