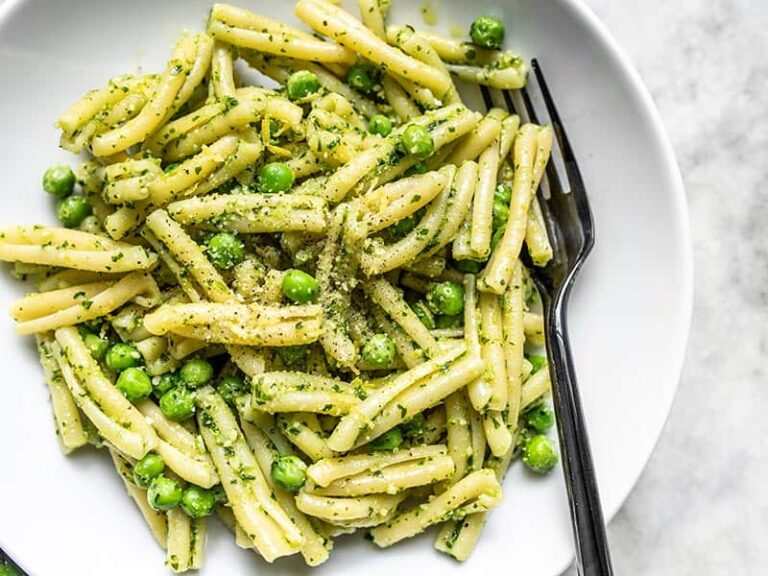
Meet the sensational Parsley Pesto Pasta with Peas – a union of flavor, nutrition, and charm. Its vibrant green color is an indicator of the powerhouse of nutrients it boasts and the taste it packs in every bite. Looking for a quick, filling and healthy delight to surprise your guests at a summer gathering? Look no further! We’ve got you covered with this pasta. But hey, don’t confine it only to special occasions, it’s too good to be restricted. Trust me, once you’ve tasted it, you’ll be reaching for a second bowl in no time.
Our lovely Parsley Pesto Pasta with Peas has a perfect balance of textures, from the smooth and silky pasta to the soft peas, and all is coated with a luscious parsley pesto that’s to die for. Let me tell you, it’s the real star here adding an amazing hit of flavor. Enough of my ramblings, you’re in for a treat with this one!
- Prep Time: 15 mins
- Cook Time: 15 mins
- Total Time: 30 mins
- Servings: 4
- Yield: 4 plates
Now let’s get down to business. Roll up your sleeves and let’s bring this masterpiece to life!
Ingredients & Equipment You’ll Need
- 2 cups Pasta
- 1 cup fresh Peas
- 3 cups fresh Parsley
- 2 cloves Garlic
- 1/2 cup Parmesan
- 1/2 cup Olive oil
- Salt to taste
- Black pepper for seasoning
For this recipe, you will need a food processor, a pot and a frying pan.
On to the purpose of important ingredients. The pasta serves as our main star providing a hearty base, while peas bring a fresh and sweet flavor that integrates beautifully in every bite. The parsley pesto, made using fresh parsley, garlic, and parmesan, brings a unique zestiness that rounds off the flavors magnificently. Substitute parsley with basil for a different twist!
How To Make Parsley Pesto Pasta with Peas
- Start by boiling your pasta in salted water. While it’s boiling, let’s move to the pesto.
- Combine the parsley, garlic, parmesan, salt, pepper and olive oil in your food processor and blend until smooth. Voila! Your homemade parsley pesto is ready. Adjust the seasoning if required.
- Once the pasta is cooked, save a little bit of pasta water, then drain and set aside.
- Heat olive oil over medium heat, add peas and cook until tender.
- Now, add cooked pasta, the saved pasta water, and the prepared pesto. Toss well to combine until pasta is well coated with pesto.
- Plate your pasta, garnish with more parmesan and pepper if you wish. Time to feast on your creation.
Tips For The Best Results
- Use fresh ingredients for optimum flavour, especially the parsley.
- Don���t overcook the pasta. We need it al dente.
- Don���t discard all of the pasta cooking water. It’s a necessary element to loosen the pesto.
Storage Tips
- Store any leftover pasta in airtight containers in the fridge for up to 3 days.
- The parsley pesto can be frozen in an ice-cube tray and stored in an airtight freezer bag for up to 2 months.
Frequently Asked Questions
Q: Can other pasta shapes be used for this recipe?
A: Yes, any pasta shape can be used. Just be sure to adjust the cooking time as per the pasta you are using.
Q: Can the parsley be replaced with another herb?
A: Absolutely! Basil would be a great substitute. However, the flavor will differ.
Q: I’m vegan. Can I omit the parmesan?
A: Yes, you can choose a vegan cheese or nutritional yeast instead.
Q: Can the dish be reheated?
A: Yes, you can reheat it in a microwave or in a pot over low heat.
Q: Is it possible to freeze the whole dish?
A: It’s better to freeze the pesto sauce separately and boil pasta when required.
Nutritional Facts of Parsley Pesto Pasta with Peas
Our Parsley Pesto Pasta with Peas is not only robust in flavour but also a powerhouse of nutrients. […] (Input nutritional facts here)
In conclusion, this Parsley Pesto Pasta with Peas is a must-try! It’s bright, flavorful, healthy and downright satisfying. My verdict? It’s a solid 10/10. Serve it with a side of fresh salad and you’ve got a perfectly rounded meal. Now, go forth and bring this recipe to life in your kitchen. Enjoy!


0 Comments