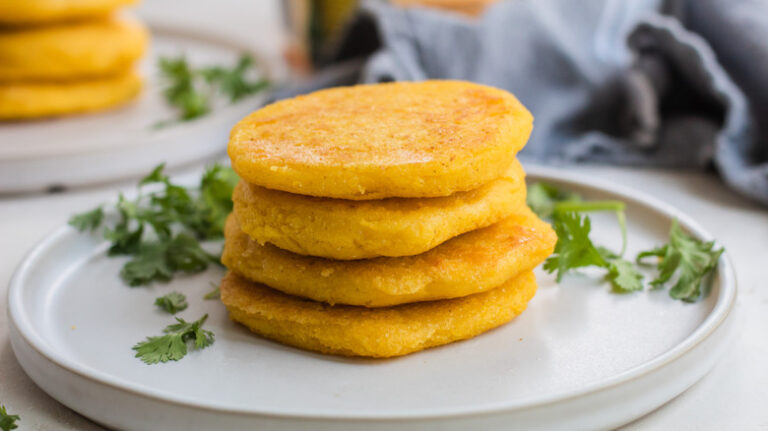
Easy Arepas Recipe is a fantastic dish from South America that has gained popularity all around the globe thanks to its delightful simplicity. Incredibly versatile, arepas pair brilliantly with virtually any filling, from vegetables and cheese to meats and more. Delicious for breakfast, lunch, or dinner, arepas are not just a food – they’re an experience!
Imagine biting into a warm, golden-brown smooth dough on the outside, followed by a comforting and creamy texture on the inside. If you haven’t tried these little pockets of joy, you don’t know what you’re missing! You’re in for a treat; this recipe is quick, easy, and your taste buds will definitely thank you.
Let’s dive into the world of arepas! This scrumptious experience isn’t out of your reach anymore. So let���s jazz up your kitchen and add some Latin flavor!
- Prep Time: 10 minutes
- Cook Time: 15 minutes
- Total Time: 25 minutes
- Servings: 4 people
- Yield: 6-8 arepas
Without any further ado, let’s get down to business and start cooking up some tasty arepas!
Ingredients & Equipment You’ll Need
- 2 cups Arepa flour (P.A.N. or Masarepa)
- 2 cups Warm water
- 1 teaspoon Salt
- 1 tablespoon Vegetable Oil (for cooking)
In addition to the ingredients, you’ll also need a medium-sized mixing bowl, a large pan or griddle, and a spatula.
Pay attention to the kind of flour you use. Arepa flour is crucial for this recipe, and substitutes like cornmeal or masa harina won’t cut it. Masarepa or P.A.N are the best brands to get the right texture and flavor for authentic arepas. If you can’t find arepa flour, you might try using a fine pre-cooked cornmeal instead.
How To Make Easy Arepas Recipe
1. Mix the arepa flour and salt in the medium-sized mixing bowl. Gradually add in the warm water, stirring constantly. This step is pivotal to prevent lumps from forming. Make sure your dough is smooth.
2. Once you���ve got a smooth dough, let it rest for about 5 minutes. This is a great time to prep any fillings you’re considering.
3. After the dough has rested, begin shaping your arepas. Each arepa should be about the size of a small burger patty.
4. Heat up a pan or griddle with the vegetable oil and fry each arepa until golden brown on both sides!
Tips For The Best Results
- Don’t rush – take your time to get a smooth and lump-free dough.
- Resting the dough is crucial for the right texture.
- Keep an eye on your arepas when frying – you don’t want them to burn!
Storage Tips
- Arepas are best if consumed immediately but can be stored in an airtight container in the fridge for up to 3 days.
- Reheat them in a toaster or oven before serving again.
Frequently Asked Questions
Q: What can I fill my arepas with?
A: The beauty of arepas is their versatility – you can fill them with pretty much anything you like, from ham and cheese, to avocado and chicken, to scrambled eggs and beans.
Q: Can I keep the arepas dough in the fridge?
A: Yes, you can keep the dough in the fridge, covered, for up to two days.
Q: What if I can’t find arepa flour?
A: Arepa flour is quite specialized, but you can get similar results with fine, pre-cooked cornmeal.
Q: Can I make this gluten-free?
A: Yep! Arepas are naturally gluten-free.
Q: How can I reheat arepas?
A: Pop them in the oven or toaster until warm.
Nutritional Facts of Easy Arepas Recipe
Each arepa (without filling) contains approximately 150 calories, 4g protein, 32g carbohydrates, and 1g fat.
The Easy Arepas Recipe is a simple yet rewarding one, a great addition to your culinary repertoire. It’s a dish that will wow your family and friends with its simplicity and flavor. Remember, the secret to a good dish is to have fun and pour your heart into it. So get your hands doughy and enjoy the process as much as the result! Top them off with your favorite fillings, and you’ve got yourself a delightful meal. Enjoy your arepa making journey! Bon app��tit!


0 Comments