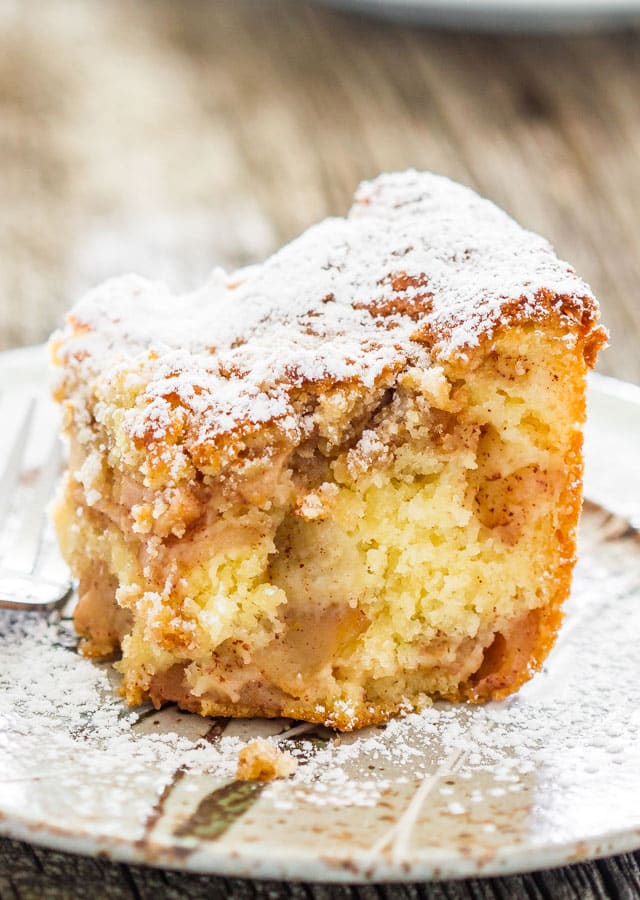
Oh, Sweet Apple Pie Cake! It���s not your typical apple pie nor a simple cake, it’s an amazing combination of the two worlds perfect for your holiday celebrations or any special occasion. Think of it as the fusion of the warm, cinnamon-y goodness of the classic apple pie tucked within the heart of a rich, fluffy yellow cake. All topped with a creamy vanilla glaze! This showstopper might just be your new festive favorite. It is beyond delicious and frankly, irresistible! Get ready because you are about to fall for this delightful dessert in a big way.
Our Apple Pie Cake won’t just fill up your belly, but it’ll also nourish your soul. I mean seriously, who can resist the apple and cinnamon combo? And the smell it emits while baking? Oh, boy! Simply mouthwatering!
- Prep Time: 30 minutes
- Cook Time: 45 minutes
- Total Time: 1 hour 15 minutes
- Servings: 8
- Yield: 1 9-inch cake
C’mon, let’s get baking! You���ll see, your kitchen will never smell so good.
Ingredients & Equipment You’ll Need
- 3 cups all-purpose flour
- 4 apple pie filling cans
- 1 cup of butter
- 2 cups of white sugar
- 4 large eggs
- 2 teaspoons vanilla extract
- 3 teaspoons baking powder
- 1 teaspoon salt
- Vanilla glaze for topping
You���ll also need an electric mixer, two 9-inch cake pans, and a baking tray.
This recipe uses apple pie filling for a classic same taste and to save time. Butter is used to ensure the cake is moist and flavorful, while the vanilla extract enhances the overall taste of the cake.
No apple pie filling on hand? No worries! You can substitute with homemade apple compote or even canned peach if you’re in for a twist.
How To Make Apple Pie Cake
- First, preheat your oven to 350 degrees F and grease two 9-inch cake pans.
- Mix together your flour, baking powder, and salt in one bowl and set aside.
- In another bowl, cream together the sugar and butter until it���s light and fluffy. Then, beat in the eggs one at a time followed by the vanilla extract.
- Gradually add your dry ingredients to the wet mixture, until everything just comes together.
- Divide the batter between the two cake pans. Spoon the apple pie filling onto the top and use a knife to swirl it into the batter.
- Bake for around 40-45 minutes or until the cake tester comes out clean. Let them cool for a bit and then remove them from the pans.
- After the cake has cooled completely, drizzle it with the vanilla glaze. Now it���s ready for you to devour!
Tips For The Best Results
- Avoid over mixing your batter, it could lead to a dense cake.
- Use room temperature ingredients for the best results.
- Allow the cakes to cool completely before adding the glaze to avoid a runny mess.
Storage Tips
- Store leftovers in an airtight container at room temperature for up to 3 days.
- You can also freeze the cake for up to 3 months. Just wrap it tightly in plastic wrap and place it in a freezer bag.
Frequently Asked Questions
A: Absolutely! You can try using different pie fillings such as blueberry, peach, or cherry. The options are endless!
Q: Can I make this Apple Pie Cake vegan-friendly?
A: Yes, you can! Substitute the butter for vegan margarine, and use a vegan egg substitute for the eggs.
Q: I don’t have cake pans, can I use a different type of pan?
A: Yes. You can use a 9×13-inch rectangular pan but you may need to adjust cooking times.
Q: Can I bake this cake in advance?
A: Definitely! This cake actually tastes better when made a day in advance. Just remember to store it properly.
Q: How can I prevent the cake from sticking to the pan?
A: Be sure to grease and flour your pans before adding the batter. This will make removing the cake from the pans much easier.
Nutritional Facts of Apple Pie Cake
Each serving of this Apple Pie Cake is likely to have approximately 350 calories, 15g fat, 50g carbohydrate, 5g protein, and 25g sugar.
To wrap up, this Apple Pie Cake is an absolute delight! It’s a dessert that you would keep in your special recipe book. The warm, comforting flavors make it a perfect sweet treat for cold winter nights, and its wow factor makes it perfect for special occasions. So grab a slice, pair it with your favorite cup of tea or coffee, and enjoy this delicious journey. Happy Baking!


0 Comments