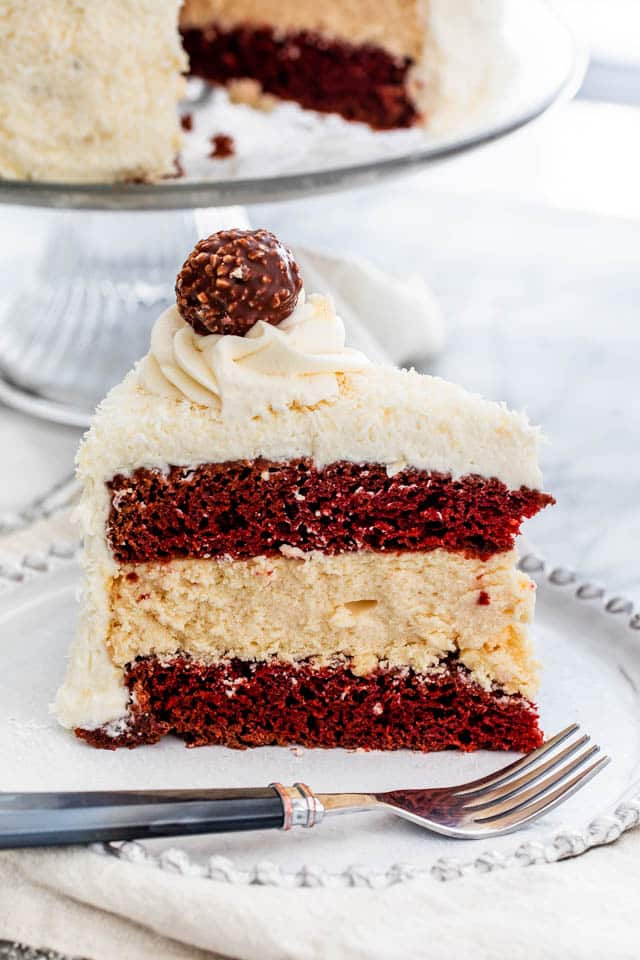
The Red Velvet Cheesecake Cake is a luxurious, flavorful, and visually appealing treat that foodies would absolutely adore. With its moist, chocolaty red velvet layers coupled with rich, creamy cheesecake at its heart, it’s a match made in dessert heaven. It’s perfect for special occasions like birthday celebrations, anniversaries or even just a festive family dinner. Why? Well, it’s not just a cake, it’s a celebration in itself! The delicious twist of two loved desserts certainly brings a whole new dimension to your table. On top of a harmonious fusion of flavors and textures, it’s also a sight for sore eyes with its vibrant red and creamy white layers enclosing in a thick velvety wave of cream cheese frostings.
- Prep time: 1 hour
- Cook time: 30 minutes
- Total time: 1 hour and 30 minutes
- Servings: 12
- Yield: 1 cake (9 inches in diameter)
Buckle up, folks! Get your apron ready, ’cause we’ll delve right into the making of this stunning beauty- The Red Velvet Cheesecake Cake.
Ingredients & Equipment You’ll Need
- 2 1/2 cups all-purpose flour
- 1 1/2 cups sugar
- 1 cup buttermilk
- 1 1/2 cups vegetable oil
- 2 large eggs
- 1 teaspoon white vinegar
- 1 teaspoon baking soda
- 2 tablespoons unsweetened cocoa powder
- 2 tablespoons red food coloring
- 1 teaspoon vanilla extract
- For Cheesecake layer:
- 16 ounces cream cheese, softened
- 2/3 cup granulated sugar
- Pinch of salt
- 2 large eggs
- 1/3 cup sour cream
- 1/3 cup heavy whipping cream
- 1 teaspoon vanilla extract
- For Cream Cheese Frosting:
- 16 ounces cream cheese, softened
- 1 cup butter, softened
- 4 cups powdered sugar
- 2 teaspoons vanilla extract

Required Equipment:
- 3 9-inch round cake pans
- Electric mixer
- Oven
How To Make Red Velvet Cheesecake Cake
- Preheat your oven to 325��F (163��C). In a bowl, mix together cream cheese and sugar for the cheesecake layer until smooth. Beat in eggs, one at a time, followed by sour cream, whipping cream, and vanilla extract. Set aside.
- For the red velvet layer, combine flour, sugar, baking soda, and cocoa powder in another bowl. In a separate bowl, beat together the buttermilk…”
Tips For The Best Results
– Always bake in a preheated oven.
– Be sure to use red food coloring that is made specifically for baking.
– Let the cake cool completely before frosting, or the frosting will melt.Storage Tips
– Store leftovers in an airtight container in the refrigerator.
– To freeze, wrap cake slices in plastic wrap and then aluminum foil. They can be frozen for up to three months.Frequently Asked Questions
Q: Can I use bottled red food coloring?
A: Yes, you can use bottled red food coloring. Just be sure to use one made specifically for baking for the best result.Q: Can I make this cake ahead of time?
A: Absolutely! The flavours actually deepen if you make it ahead of time.Q: Can I use a 9��13 pan instead of two 9-inch round pans?
A: Yes, you can use a 9×13-inch pan. The cake layers may be slightly thinner and you may need to adjust the baking time.Q: What can I do if I don���t have buttermilk on hand?
A: You can substitute buttermilk by adding 1 tablespoon of lemon juice or vinegar to a cup of milk. Let it sit for a few minutes to curdle.Q: Is the cheesecake layer baked separately from the cake layer?
A: Yes, the cheesecake layer is baked first and allowed to chill before assembling the cake.Nutritional Facts of Red Velvet Cheesecake Cake
Per serving:
Calories – 710,
Fat – 34g,
Cholesterol – 170mg,
Sodium – 450mg,
Carbohydrates – 91g,
Protein – 8g,
Sugars – 70gIn a nutshell, the Red Velvet Cheesecake Cake is an indulgence deeply worth diving into. Its perfect balance of chocolaty, tangy, and just the right amount of sweetness would make any occasion even more special. I personally love to serve it alongside a cup of piping hot coffee. Ready to make a statement with this showstopper? Get baking!


0 Comments