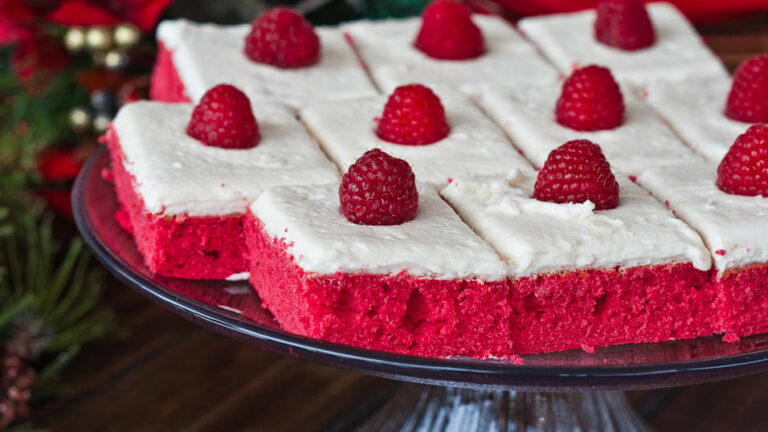
Our Red Velvet Sheet Cake is an eye-catcher with its rich, bright color topped with creamy frosting. It’s a Southern classic that has become a favorite for numerous occasions. Birthdays, holidays, or even just a regular day, Red Velvet Sheet Cake can make it special. The fluffy yet moist cake layered with velvety cream cheese frosting is a taste you can’t resist. This cake is love at first sight, especially for cake enthusiasts. Our version offers an extra moist texture for a melt-in-your-mouth experience.
With our guided recipe, you can nail this dish and impress your guests. The tangy frosting compliments the sweetness of the cake, and the combination is nothing short of decedent. Enough chit-chat, let���s put on our aprons and get our hands dirty!
- Prep Time: 20 minutes
- Cook Time: 30-35 minutes
- Total Time: 60 minutes
- Servings: 15
- Yield: 1 sheet cake
Now let’s dive into the recipe for this delectable cake!
Ingredients & Equipment You’ll Need
- 2 1/2 cups of all-purpose flour
- 1 1/2 cup of granulated sugar
- 1 cup of vegetable oil
- 1 cup of buttermilk
- 2 large eggs
- 1 teaspoon of vanilla extract
- 1 teaspoon of baking soda
- 1 teaspoon of vinegar
- 2 tablespoons of cocoa powder
- 1-2 tablespoons of red food coloring
- 1/4 teaspoon of salt
- 1 cup of softened butter
- 4 cups of powdered sugar
- 8 ounces of cream cheese
You will also need an electric mixer, a large bowl, a spatula, measuring cups and spoons, and a 9×13 inch cake pan.
These ingredients are essential for the perfect Red Velvet Sheet Cake. Cocoa powder and buttermilk give the cake its distinctive taste, while the red food dye provides the dramatic red color. The vinegar reacts with the baking soda, providing the lift necessary for a fluffy texture
How To Make Red Velvet Sheet Cake
- Preheat your oven to 350 degrees F (175 degrees C) and lightly grease your 9×13 inch cake pan.
- Mix all-purpose flour, granulated sugar, and salt in a large bowl.
- Add in eggs, vegetable oil, buttermilk, vanilla extract, vinegar, cocoa powder, and red food coloring to the bowl. Mix until smooth.
- Pour the batter into the prepared pan and smooth the top with a spatula.
- Bake for around 30-35 minutes, or until an inserted toothpick comes out clean.
- While the cake is cooling, beat butter, cream cheese, and powdered sugar together until creamy for your frosting.
- Once the cake is cooled, spread the frosting evenly over the top.
- Now, cut into squares and serve your delicious cake!
Tips For The Best Results
- Make sure all ingredients are at room temperature before starting.
- Don’t overmix the batter as it can result in a dense cake.
- Always preheat the oven before baking your cake.
Storage Tips
- Store the frosted cake covered, in the refrigerator.
- You can freeze the unfrosted cake for up to 2 months.
Frequently Asked Questions
Q: Can I use something instead of buttermilk?
A: Yes, you can use a mixture of milk and vinegar as a substitute for buttermilk.
Q: Can I make this cake without red food coloring?
A: Yes, you can. However, the cake won’t have the classic “red velvet” look.
Q: Can I halve this recipe?
A: Certainly! Just divide all the measurements by half.
Q: Can I use a different kind of frosting?
A: Of course! Feel free to get creative and use your favorite kinds of frosting, although cream cheese frosting is traditionally used.
Q: Can I use this recipe to make cupcakes instead of a sheet cake?
A: Absolutely! Just remember to adjust the baking time.
Nutritional Facts of Red Velvet Sheet Cake
Our Red Velvet Sheet Cake contains approximately 370 calories per slice. It also includes 47g of carbohydrates, 6g of protein, 18g of fat, and 33g of sugar.
As we wrap up, I’m hoping y’all enjoyed this tutorial and are ready to tear it up in the kitchen. This Red Velvet Sheet Cake is a delight for the senses, sure to please everyone at your table. Pair it with a scoop of vanilla ice cream for an extra treat. Happy baking!


0 Comments